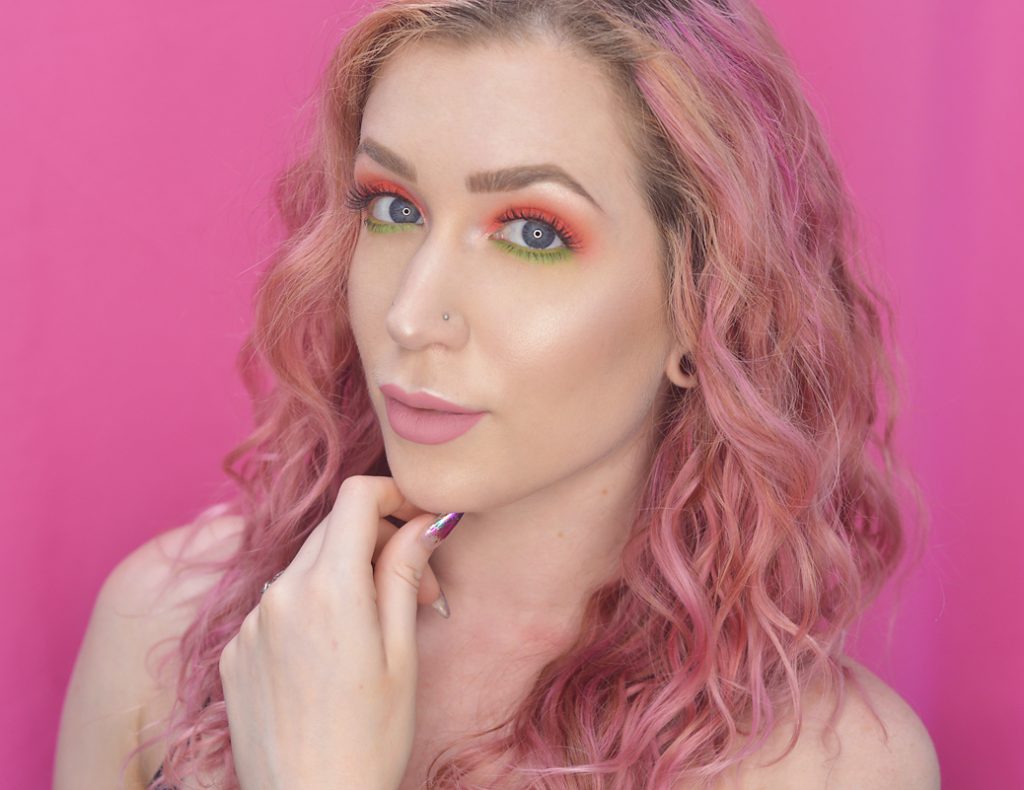
I receive a lot of questions about how I highlight my face, so today I decided it would be fun to put together a little tutorial for you! There are many different methods of highlighting, but this is my favorite way to get my glow on. You would do these steps after all of your makeup is finished other than blush and lipstick. Make sure to first set any liquid or cream products with powder to prevent the blending action of the highlighter brush from disrupting your foundation.
How To Highlight
CHEEKBONES
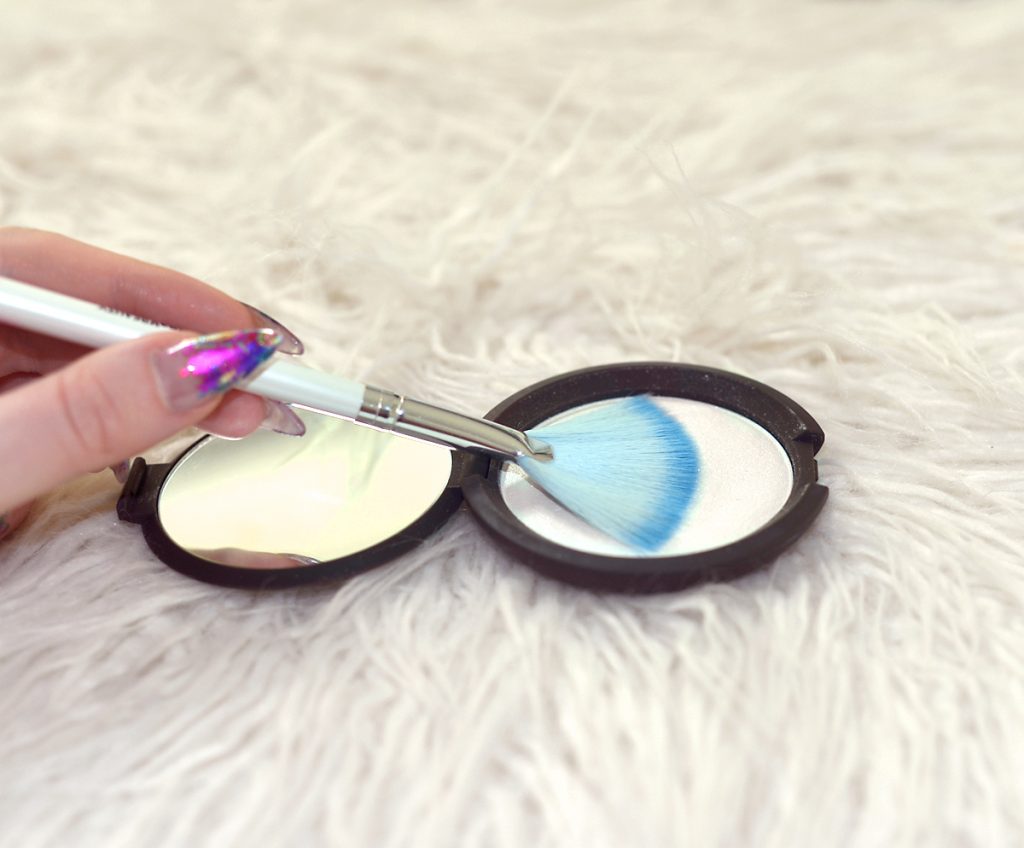
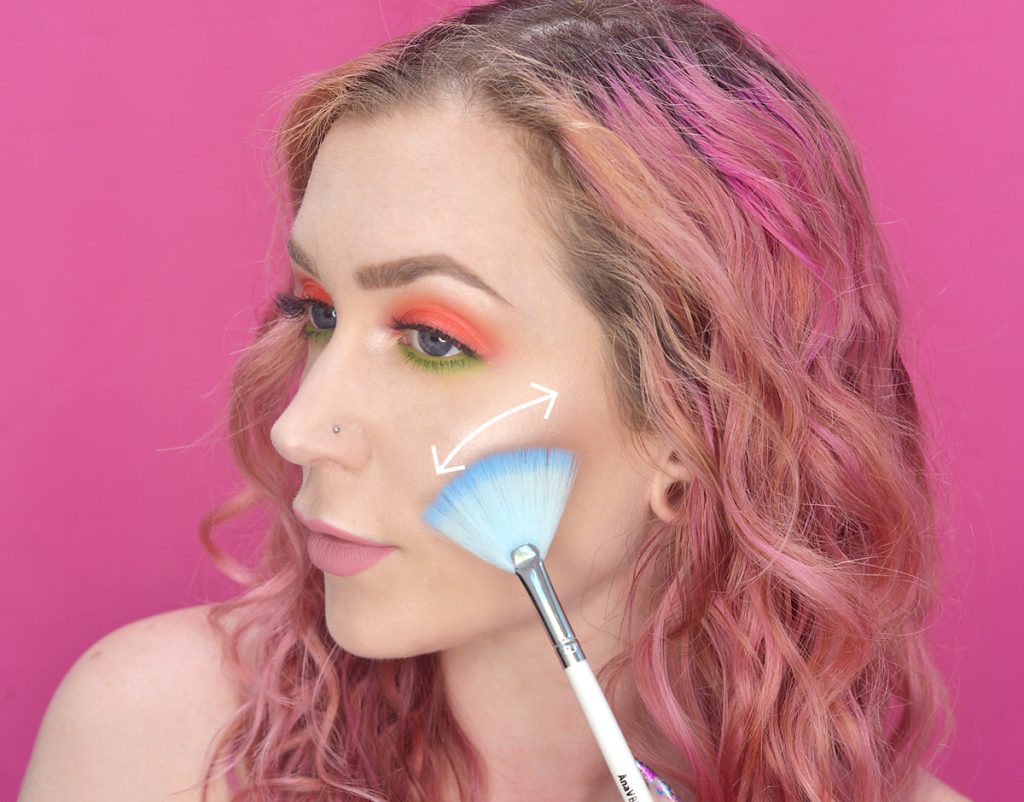
If you are just learning how to highlight and only want to highlight one area, the cheekbones are where you will want to start! Highlighting this area will create the biggest impact and will help to sculpt your face. This step happens after contour and bronzer, if you are doing those. Begin by swiping the side of a fan brush against your highlighter. You want to get the product right where the flat side meets the edge of the brush (see image above). Tap off the excess and then sweep the brush sideways in a diagonal line across the highest part of your cheekbone. Focus on placing most of the product about an inch below the corner of your eye, and then blend it from that point. Most of the blending will be along that diagonal line. Optionally, at the end, you can also brush in tiny, gentle, up and down movements to soften the edges of your glow even more. If you are going to wear blush, you would apply that afterwards in order to even further diffuse the transition of your highlighter..
NOSE
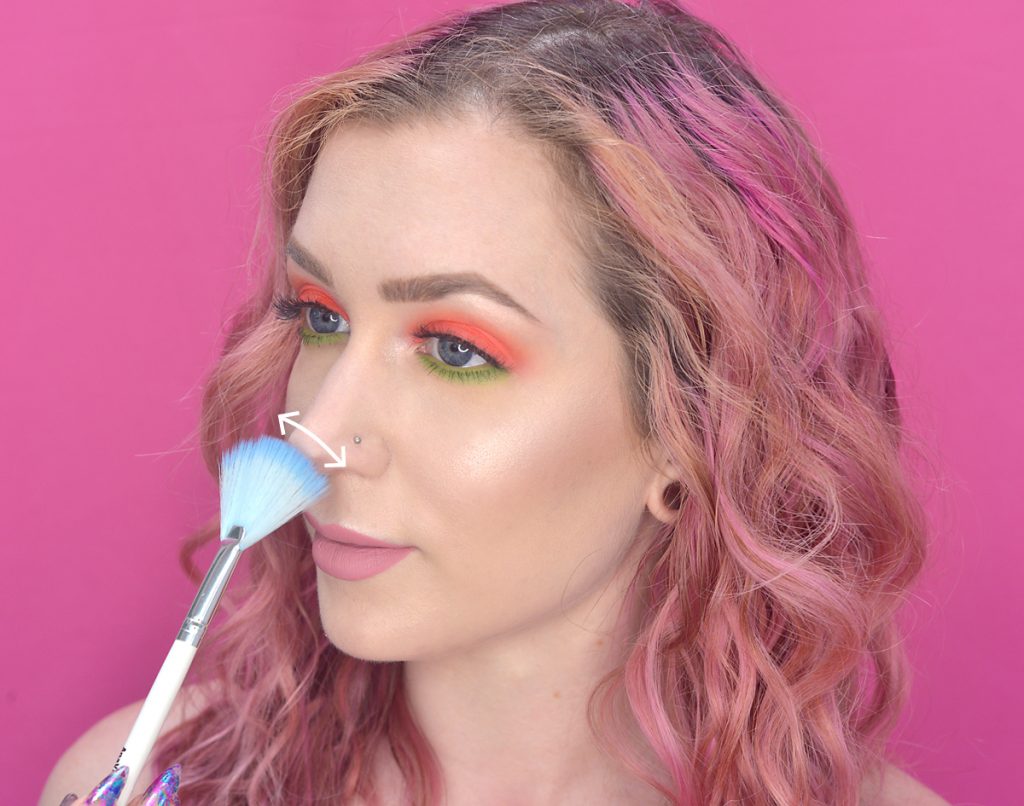
Highlighting your nose helps to refine the shape of your nose and also give your face a youthful glow. Just like with your cheekbones, sweep the edge of the flat part of your fan brush against your highlighter. Use a back-and-forth motion to apply the product to the tip of your nose.
BROWS
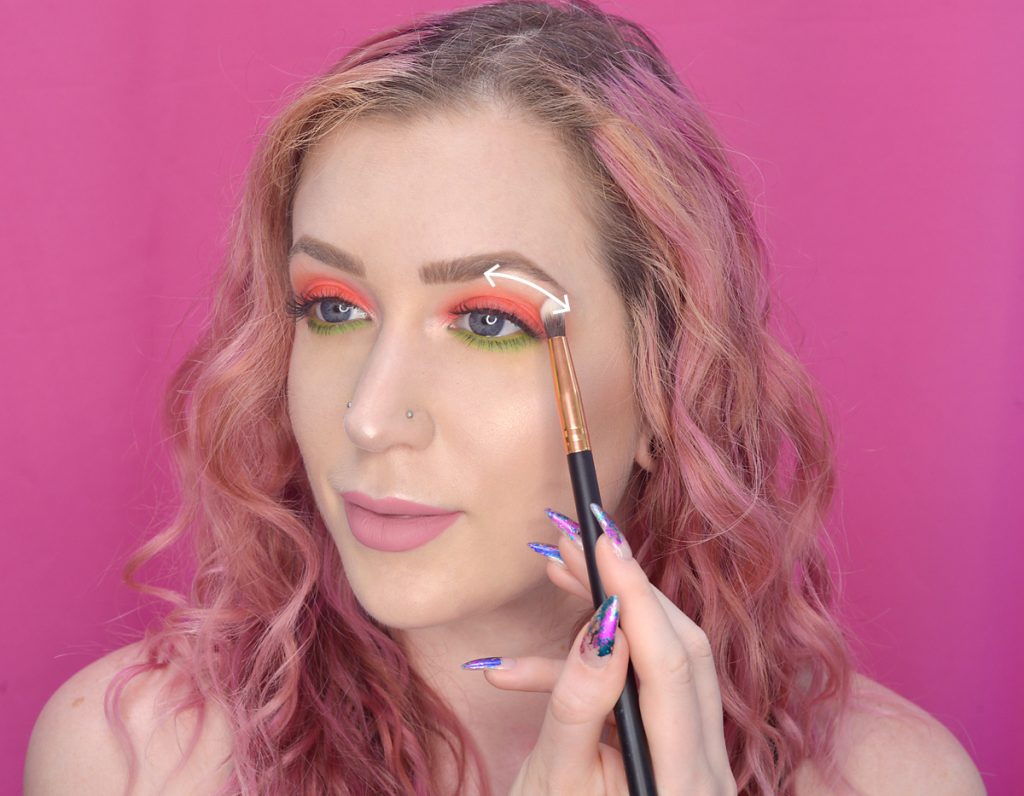
Placing highlighter underneath the arch of your eyebrows will give you the appearance of an instant brow lift. Use a pencil brush or a small domed eyeshadow brush to apply the product by softly brushing back and forth.
INNER EYE CORNERS
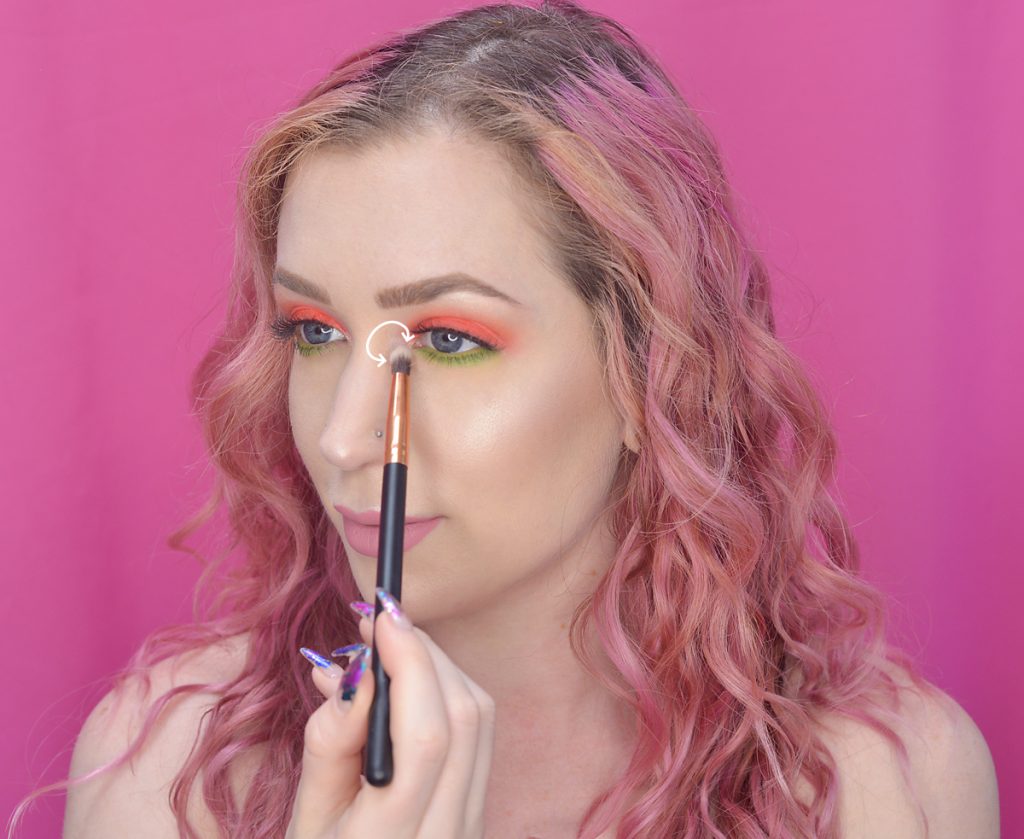
Highlighting the inner corners of your eyes gives your eyes a more open and awake look. Just like with my brows, I like to use a pencil brush or domed eyeshadow brush. I place down the product using a gentle dabbing motion and then blend in tiny circles.
CUPID’S BOW
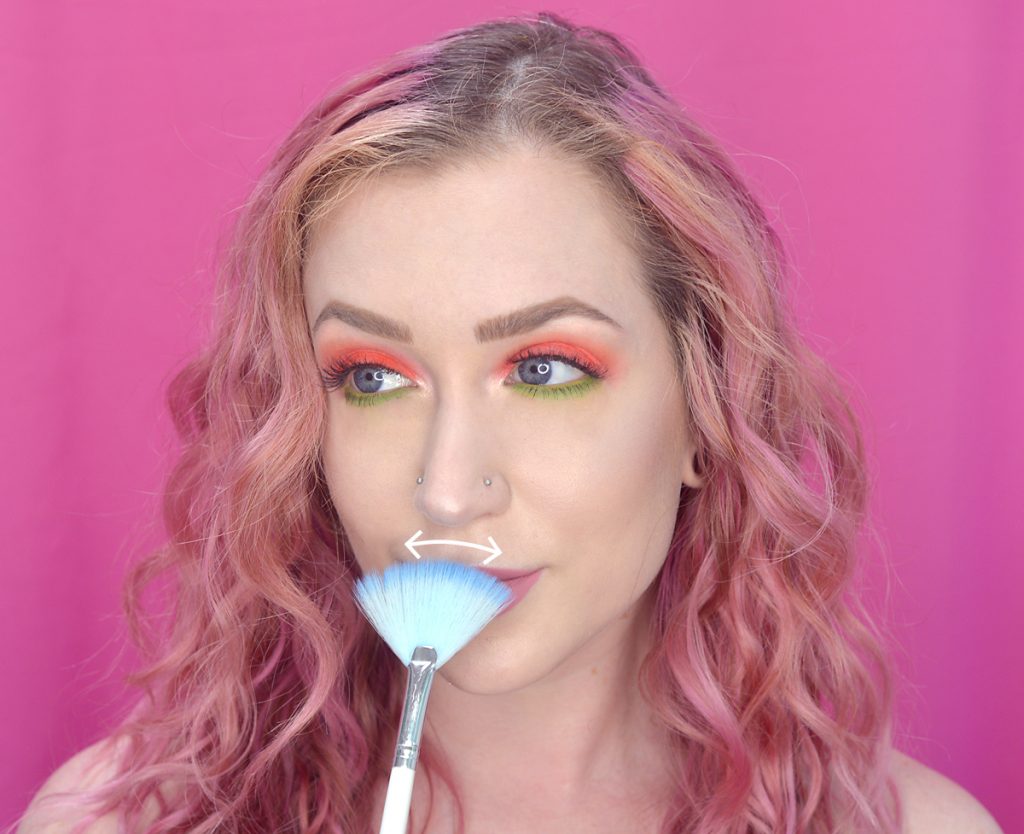
Applying highlighter to your cupid’s bow gives your lips a fuller, poutier appearance. Swipe the edge of the flat part of your fan brush very lightly across your cupid’s bow. Apply as little pressure as possible; a little goes a long way on this area. If you want a more intense highlight, you can sweep the brush along your upper lip line almost to the corners of your mouth. Make sure to do this step before you apply your lipstick, unlike in this photo! Applying lipstick afterward will cover any highlighter that gets onto your lips.
Makeup Details
Face
Cover FX Natural Finish Foundation – P10
Cover FX Perfect Setting Powder – Light
Physician’s Formula Bronze Booster – Matte Sculpting
Physician’s Formula Butter Bronzer – Light
NYX Ombre Blush – Sweet Spring
Becca Skin Perfector Pressed Highlighter – Pearl
Cover FX Illuminating Setting Spray
Eyes
NYX Primal Colors – Hot Orange
NYX Prismatic Pro Eyeshadow – Venom/a>
Chella Eyebrow Pencil – Tantalizing Taupe
Lips
Kylie Cosmetics Lip Kit – Smile (discontinued)
